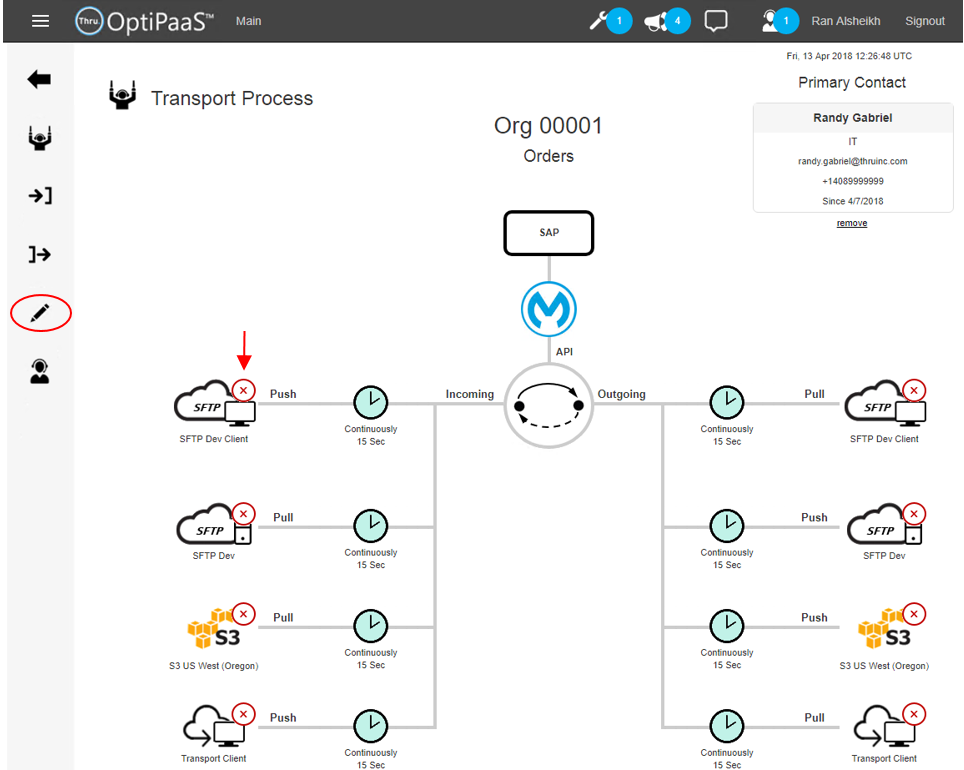
Transport Process Setup
This section will walk you through the simple steps to associate your endpoints with a Transport.
A Transport can have multiple sources and targets as shown here.
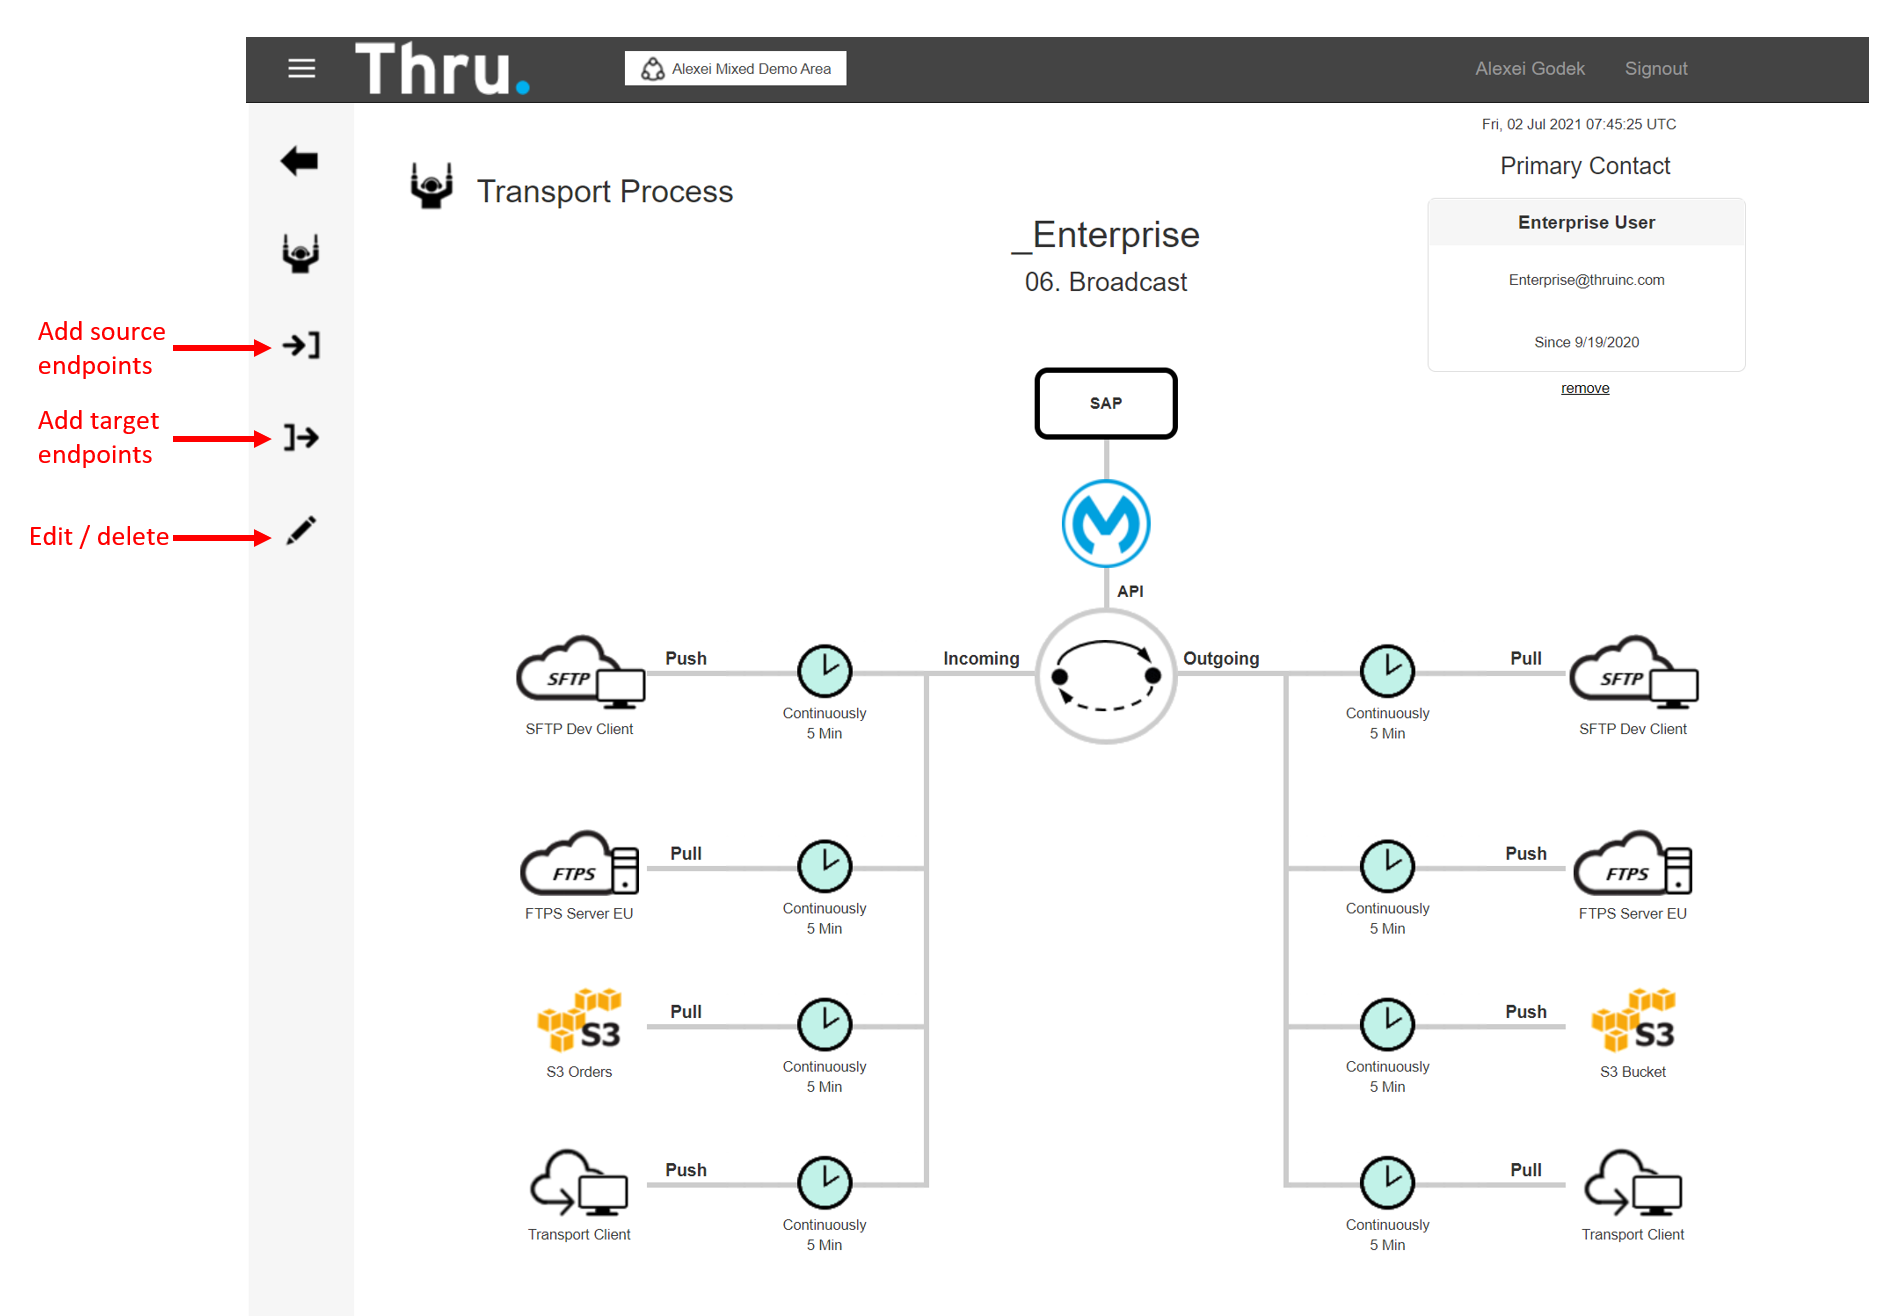
If you define the same endpoint as both source and target, the system will deliver responses on the same endpoint only.
For example, a private exchange transport might send a file using ‘SFTP Dev Client’ above.
The transport will prepare a response and deliver it only to the target ‘SFTP Dev Client’.
If the system does not find a matching endpoint the response will be delivered to all targets.
Use the action bar to add source and target endpoints.
Endpoints can be added only once.
‘User Action’ and ‘Transport Client’ are always available – you do not need to define them as part of the organization endpoints.
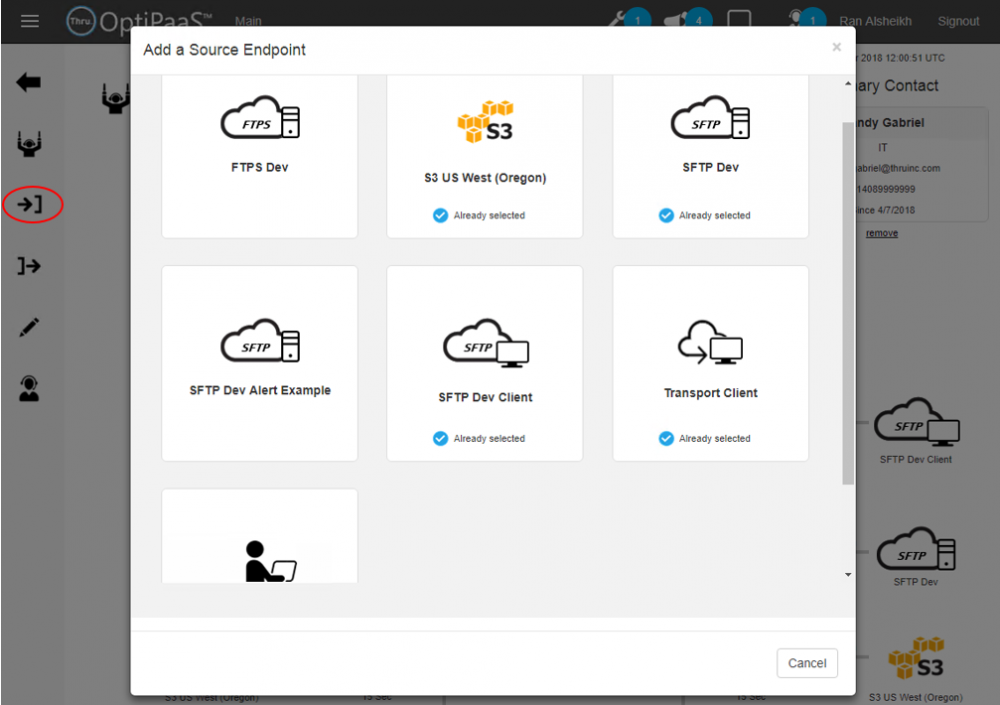
When you choose an endpoint Thru automates the MFT setup for you!
Here is an example of a server source endpoint.
Note : You only need to define where on the source the files should be pulled from (S3 access and secret keys are defined once in the endpoint and you can reuse them in multiple transports).
In the S3 example here, you define the bucket and the folder path.
The provisioning on the Thru side is automatic – you don’t need to decide where the files will land.
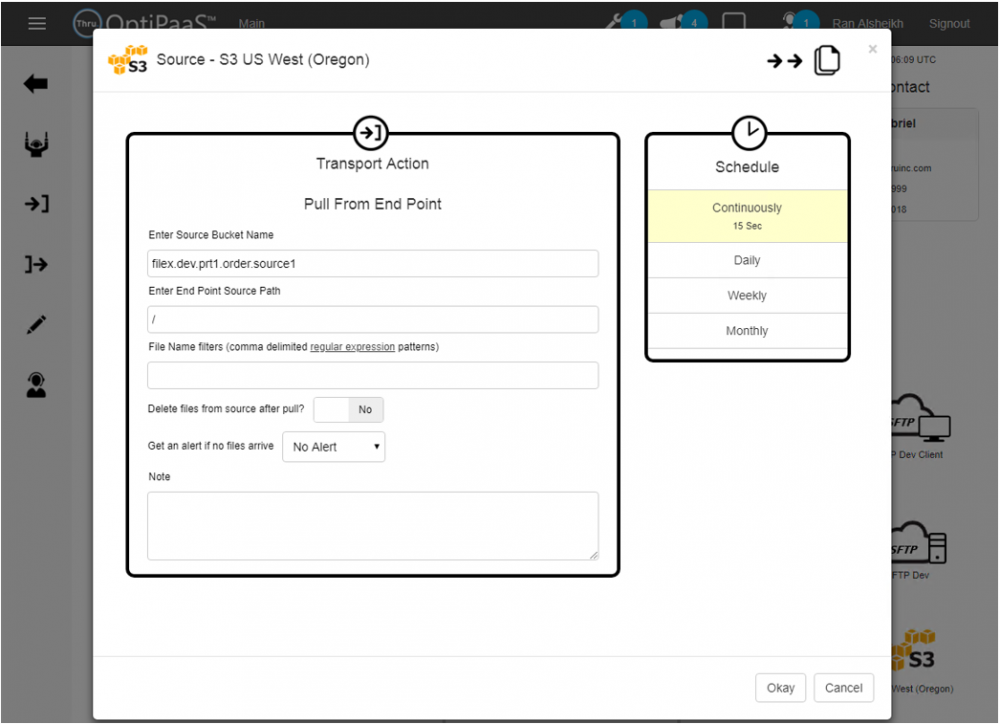
An important feature to notice is the ability to define alerts for inactivity.
If you select an inactivity period, the system will raise alerts and send notifications.
An alert will be created not only if files are not arriving – it will also be created if file arrive but all processed files in the inactivity period fail.
Note : Thru alerts will not spam you continually. Once an alert is created, it will not create duplicates but increment the retry count instead.
On the right hand side you can define the schedule.
If you define schedules other than ‘continuously’ the system will show the clock on the diagram in ‘green’ only when UTC time is inside the process schedule.
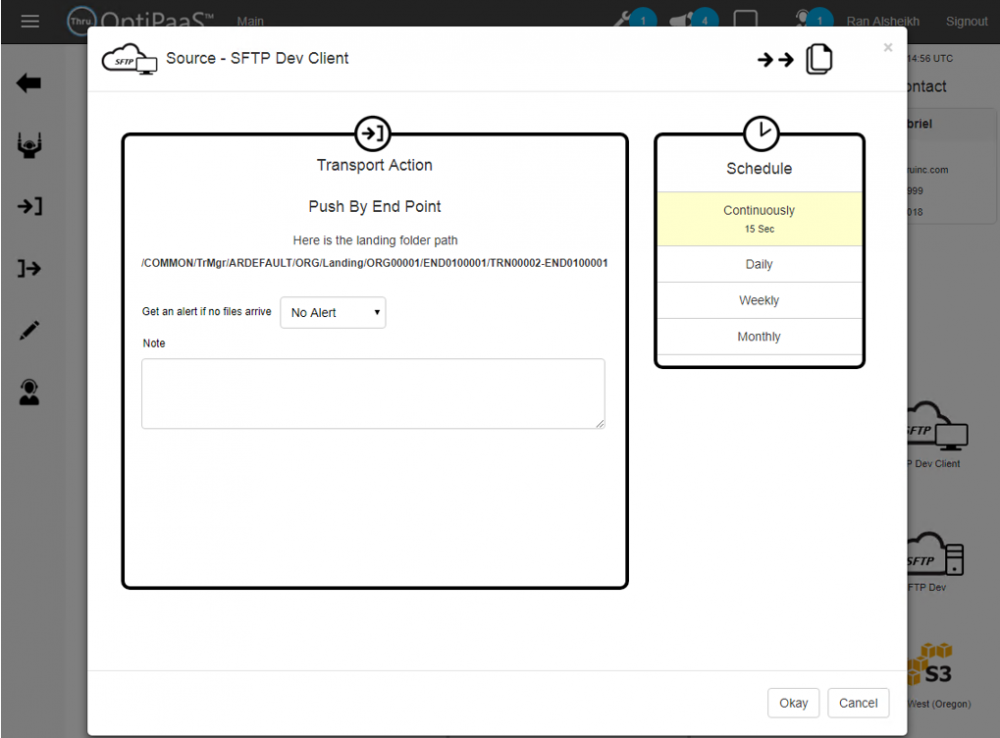
Here is an example of a client source endpoint.
The system automatically generates a landing path for you to drop the files.
The Thru user/password or client certificate is defined one in the endpoint and can be reused in multiple transports.
Here is an example of a server target endpoint. All you need to do is specify the target folder on your server.
Thru will push the files on schedule.
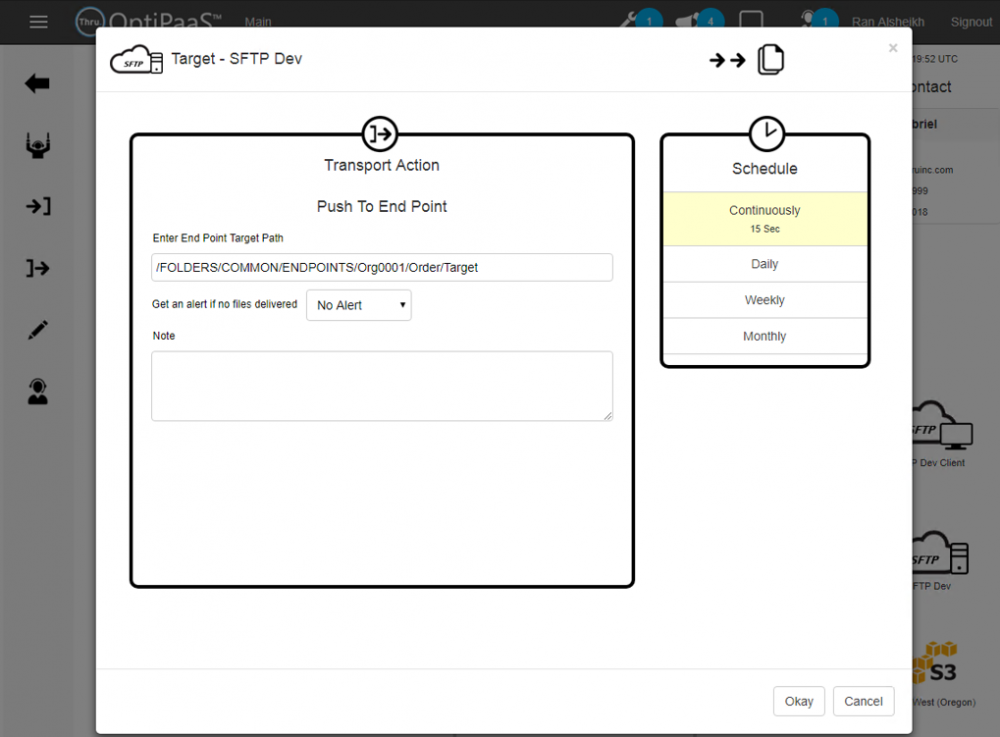
Delivery inactivity period can be defined to receive alerts.
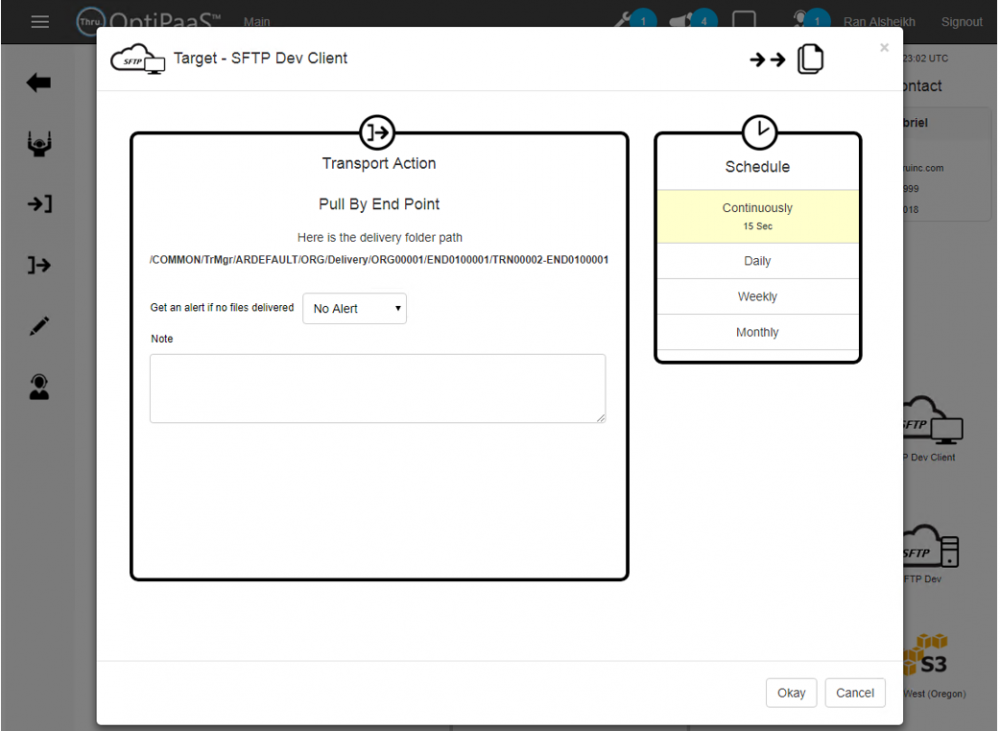
Here is an example of a Target Client Endpoint.
Thru will place the file in a delivery folder for you to pull it.
Once you have pulled the file, you should delete it – The system uses the delete action to create a ‘Pull Receipt’ record to mark that the delivery was completed.
To delete endpoint click on the edit icon on the action bar. You will see red ‘delete’ icons.
